


Clari Groove provides a powerful integration with LinkedIn Sales Navigator through its Omnibar interface, allowing users to view and engage with LinkedIn prospect data directly from their inbox, calendar, Salesforce, and Groove web app. This integration simplifies prospecting and delivers meaningful insights for sales and customer success teams. However, if your organization does not use LinkedIn Sales Navigator, the LinkedIn tab can be easily disabled.
The good news is that you don’t need to raise a support case for this. Admins can easily disable the LinkedIn Sales Navigator tab directly from the Groove Custom Settings in Salesforce.
Steps to Remove the LinkedIn Tab:
- Go to Salesforce Setup
- In Salesforce, click on the gear icon (⚙️) in the top right corner.
- Select Setup.
- In Salesforce, click on the gear icon (⚙️) in the top right corner.
- Search for Custom Settings
- In the left-hand Quick Find box, type Custom Settings.
- Click on Custom Settings.
- In the left-hand Quick Find box, type Custom Settings.
- Open Groove Settings
- Under Groove Settings, click Manage.
- Click Edit to update the default organization-level values.
- Under Groove Settings, click Manage.
- Disable LinkedIn Sales Navigator
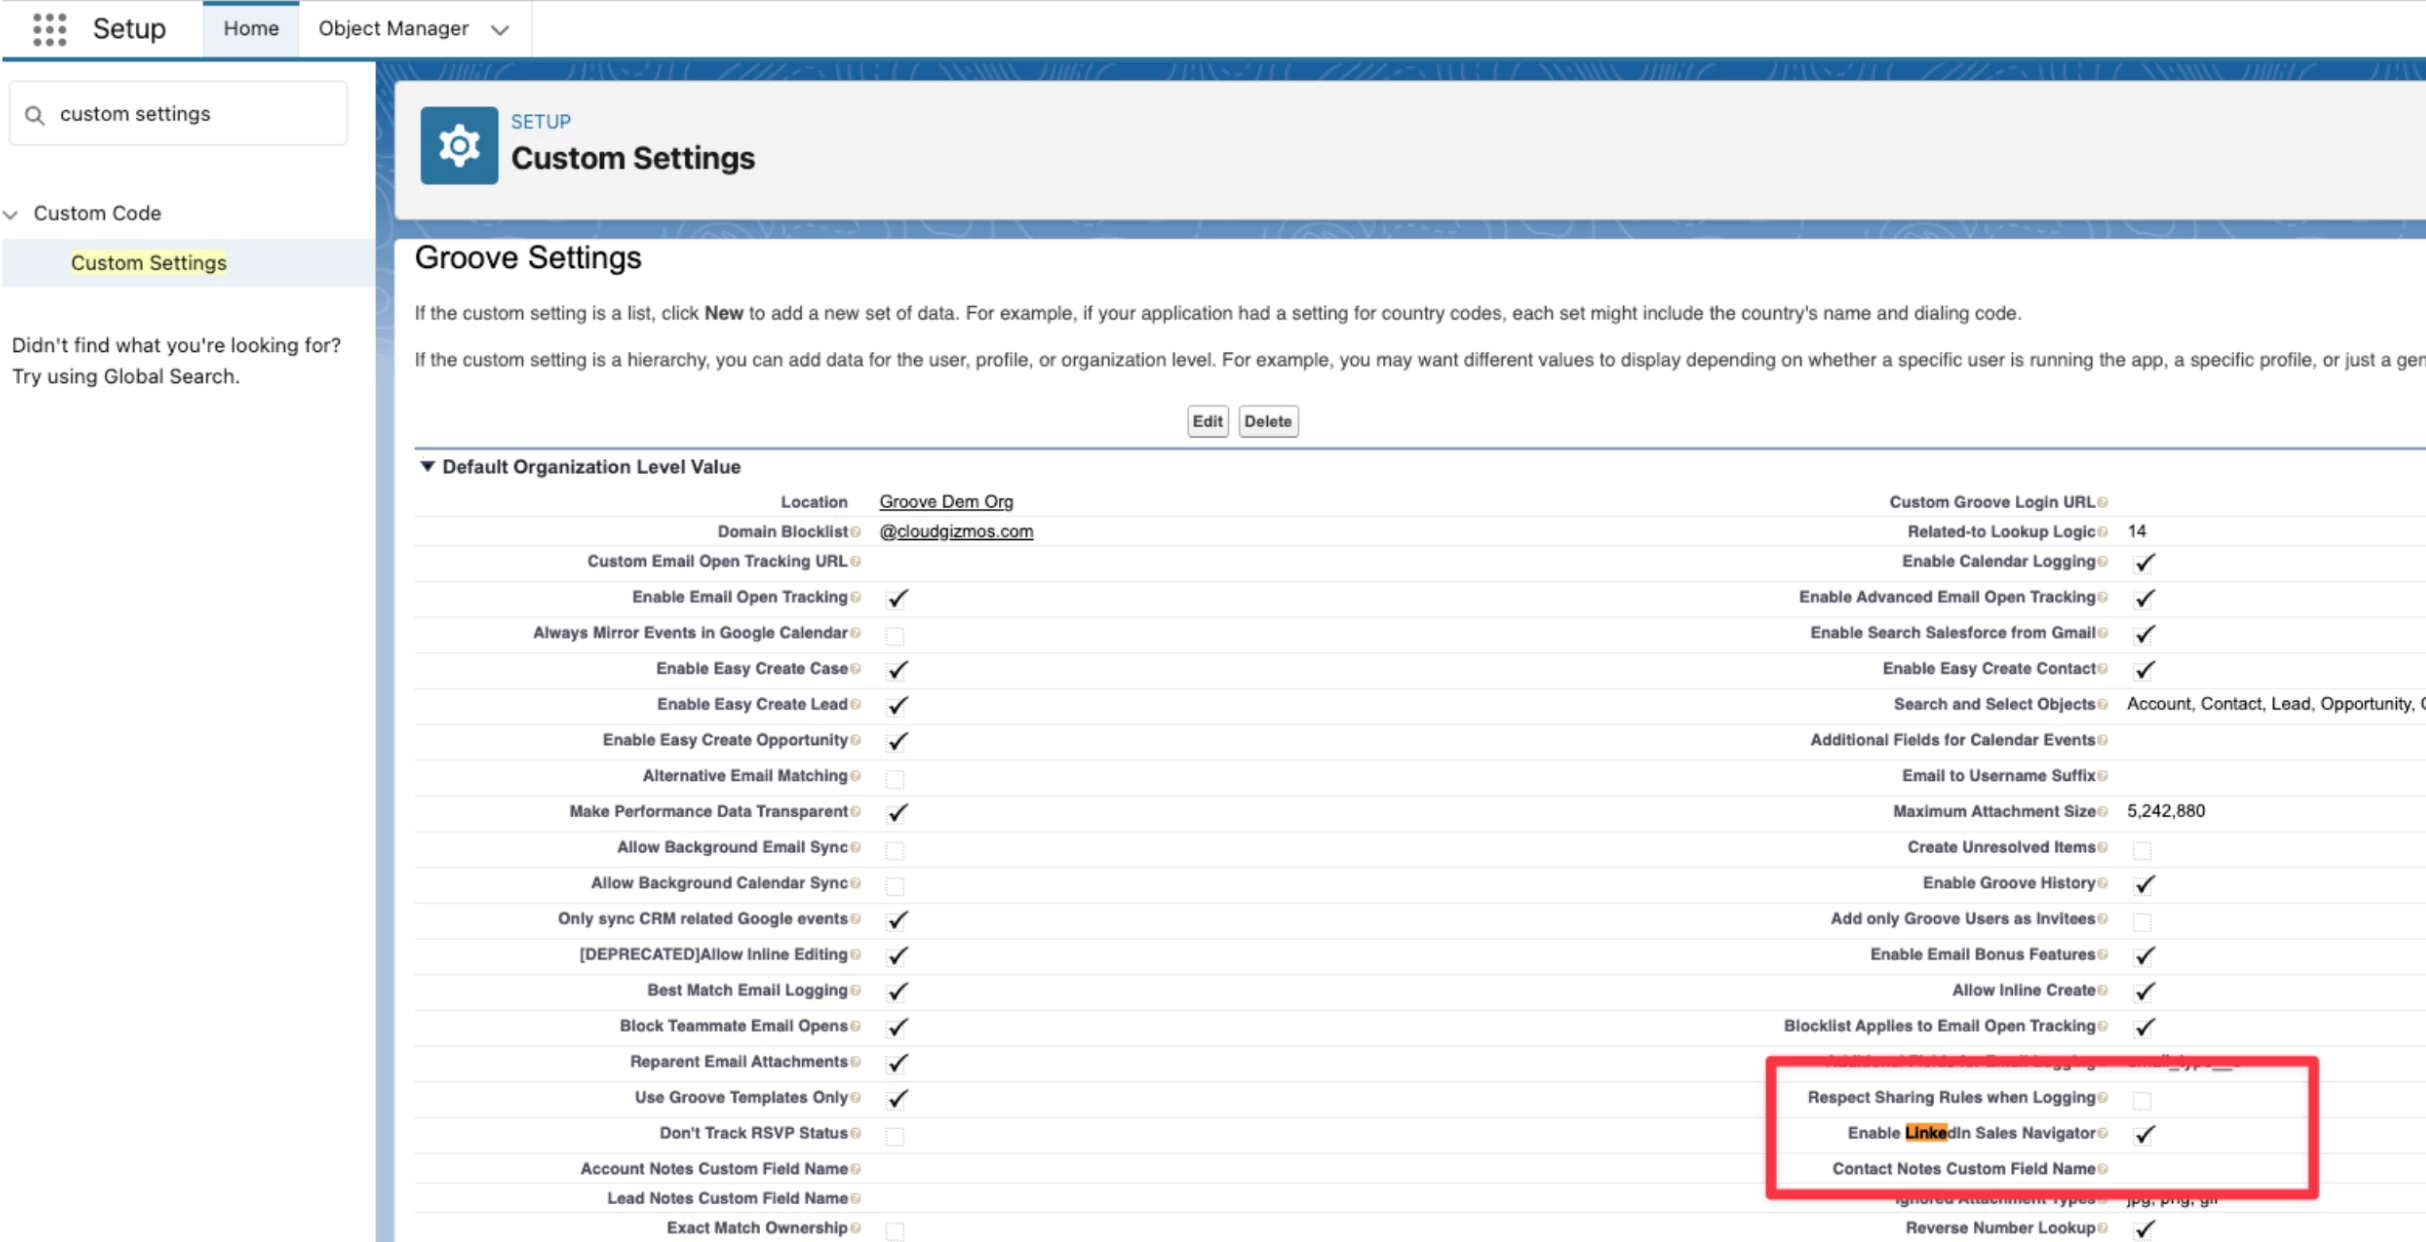
- Scroll down to the option “Enable LinkedIn Sales Navigator”.
- Uncheck the box.
- Scroll down to the option “Enable LinkedIn Sales Navigator”.
- Save the Changes
- Click Save.
- Click Save.
That’s it! Once saved, the LinkedIn tab will disappear from the Groove Omnibar for all users, preventing confusion and ensuring a cleaner workflow.
Here’s what it looks like in Salesforce Custom Settings (highlighted section):
Pro Tip: You can revisit the same settings page anytime if you decide to re-enable LinkedIn Sales Navigator in the future.
If you have any further questions or need technical help, feel free to comment below or reach out to our Support team! 🙂