


Overview
Saved Views in Analytics and Accounts allow users to save a specific sets of filters—aka views. 😎 You can also share views with other users and easily switch between your Saved Views.
This saves you lots of time because you no longer have to memorize and apply combinations of filters. You'll not only move faster but view your data in a more constant way—this also ensures other teammates can see the exact same data.
Use Cases
Exec: A Chief Revenue Officer might have some standard views they use to brief the CEO and the board. They save all of them so they can quickly switch between them during meetings and convos.
Manager: A sales manager can create a Saved View for their team’s weekly meeting and share it with everyone so teammates can see their progress at any time.
Sales Rep: A sales rep might use Saved Views to easily segment their book of business—and switch between these views with a single click—keeping them aware of their progress.
Sales Ops: A Sales Operations lead can standardize the views their Sales team should use, and share them with the entire organization. This helps with onboarding efficiency and makes Clari more user-friendly for all their users.
How to Use Saved Views in Different Modules
You can now use Saved Views in the Opportunities Module, Accounts Module, and in all of the Analytics Modules (Waterfall, Flow, Funnel, Pulse, and Trend). Check out these step-by-steps for using views in each module.
Saved Views in Analytics and Accounts
Let's cover the Accounts and Analytics Modules first. You can use views in Accounts or in any of the Analytics Modules (Waterfall, Flow, Funnel, Pulse, and Trend).
To create a Saved View:
1. Go to the Accounts Module or any Analytics module (Waterfall, Flow, Funnel, Pulse, or Trend).
2. Selects the filters and mode you want to use in your view.

3. Click Save or Save As New at the top right.
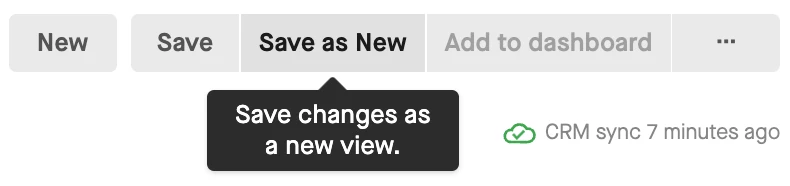
4. Name the view and click Save.
To share a Saved View in Accounts or Analytics:
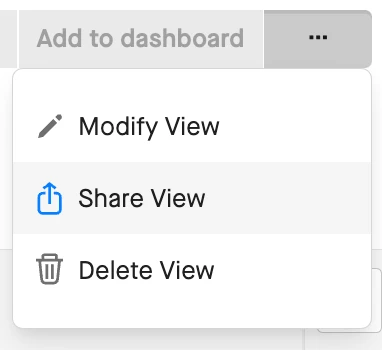
1. Click … in the top right.
2. Click Share View.
3. Choose to share with specific roles or users.
4. Select those roles or users, and click Next.
5. Confirm your changes and click Share.
Note: All users can share views that they own. But only Advanced Ops Admins can edit/delete views that don't belong to them.